
공부해봅시당
[성능 테스트] nGrinder + Springboot 부하 테스트 준비 - groovy 파일로 스크립트 실행해보기 본문
[성능 테스트] nGrinder + Springboot 부하 테스트 준비 - groovy 파일로 스크립트 실행해보기
tngus 2023. 11. 7. 17:29아래 링크를 참고하여 작성된 글입니다
https://leezzangmin.tistory.com/42
nGrinder + Springboot 부하 테스트 튜토리얼
개인 프로젝트를 진행하면서 스프링 어플리케이션의 성능을 측정해보고자, 네이버에서 만든 (오픈소스 + 무료 + 한글 + Java스러운 Groovy 스크립트 지원 + 자료가 그나마 많은) 부하테스트 툴 nGrinde
leezzangmin.tistory.com
테스트 스크립트는 상단 메뉴바에서 Script를 선택해 들어가 작성하면 됨

여기서 +Create 버튼 -> Create a script 클릭

대강 스크립트 이름을 test로 진행해보자

그럼 자동으로 이런 스크립트가 만들어짐

자동으로 생성된 파일의 이름을 살펴보면 확장자가 groovy인 것을 알 수 있음
따라서 해당 테스트 코드는 Groovy로 작성해야 함
Groovy
위에서 이미 확인했듯, 테스트 스크립트는 Groovy라는 언어로 작성해야 함
Junit5 기반이며 Java와 비슷해서 어렵지 않다고 함
기본으로 작성되어 있는 코드는 아래와 같음
import static net.grinder.script.Grinder.grinder
import static org.junit.Assert.*
import static org.hamcrest.Matchers.*
import net.grinder.script.GTest
import net.grinder.script.Grinder
import net.grinder.scriptengine.groovy.junit.GrinderRunner
import net.grinder.scriptengine.groovy.junit.annotation.BeforeProcess
import net.grinder.scriptengine.groovy.junit.annotation.BeforeThread
// import static net.grinder.util.GrinderUtils.* // You can use this if you're using nGrinder after 3.2.3
import org.junit.Before
import org.junit.BeforeClass
import org.junit.Test
import org.junit.runner.RunWith

import org.ngrinder.http.HTTPRequest
import org.ngrinder.http.HTTPRequestControl
import org.ngrinder.http.HTTPResponse
import org.ngrinder.http.cookie.Cookie
import org.ngrinder.http.cookie.CookieManager

/**
* A simple example using the HTTP plugin that shows the retrieval of a single page via HTTP.
*
* This script is automatically generated by ngrinder.
*
* @author admin
*/
@RunWith(GrinderRunner)
class TestRunner {

	public static GTest test
	public static HTTPRequest request
	public static Map<String, String> headers = [:]
	public static Map<String, Object> params = [:]
	public static List<Cookie> cookies = []

	@BeforeProcess
	public static void beforeProcess() {
		HTTPRequestControl.setConnectionTimeout(300000)
		test = new GTest(1, "Test1")
		request = new HTTPRequest()
		grinder.logger.info("before process.")
	}

	@BeforeThread
	public void beforeThread() {
		test.record(this, "test")
		grinder.statistics.delayReports = true
		grinder.logger.info("before thread.")
	}

	@Before
	public void before() {
		request.setHeaders(headers)
		CookieManager.addCookies(cookies)
		grinder.logger.info("before. init headers and cookies")
	}

	@Test
	public void test() {
		HTTPResponse response = request.GET("http://please_modify_this.com", params)

		if (response.statusCode == 301 || response.statusCode == 302) {
			grinder.logger.warn("Warning. The response may not be correct. The response code was {}.", response.statusCode)
		} else {
			assertThat(response.statusCode, is(200))
		}
	}
}
이 코드를 자신의 프로젝트에 맞도록 커스텀하여 테스트를 진행하면 됨
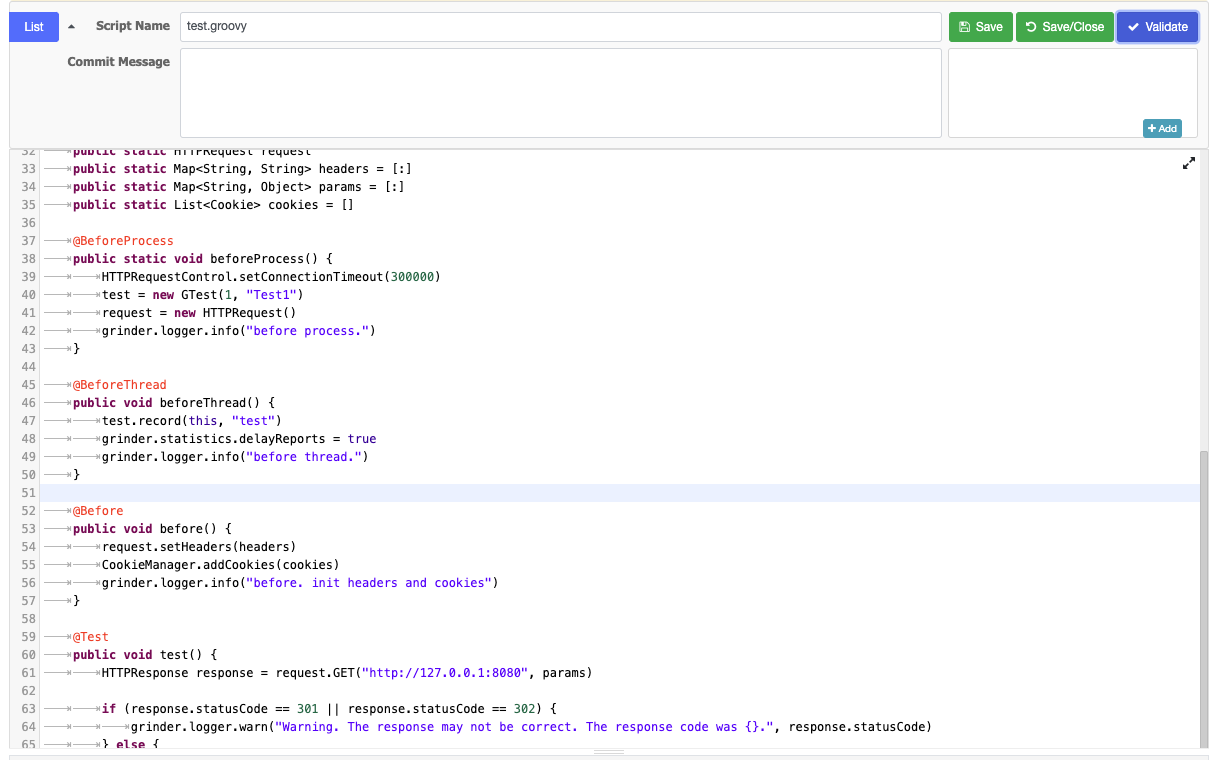
나의 경우는 아래와 같이 수정함
import static net.grinder.script.Grinder.grinder
import static org.junit.Assert.*
import static org.hamcrest.Matchers.*
import net.grinder.script.GTest
import net.grinder.script.Grinder
import net.grinder.scriptengine.groovy.junit.GrinderRunner
import net.grinder.scriptengine.groovy.junit.annotation.BeforeProcess
import net.grinder.scriptengine.groovy.junit.annotation.BeforeThread
// import static net.grinder.util.GrinderUtils.* // You can use this if you're using nGrinder after 3.2.3
import org.junit.Before
import org.junit.BeforeClass
import org.junit.Test
import org.junit.runner.RunWith

import org.ngrinder.http.HTTPRequest
import org.ngrinder.http.HTTPRequestControl
import org.ngrinder.http.HTTPResponse
import org.ngrinder.http.cookie.Cookie
import org.ngrinder.http.cookie.CookieManager

/**
* A simple example using the HTTP plugin that shows the retrieval of a single page via HTTP.
*
* This script is automatically generated by ngrinder.
*
* @author admin
*/
@RunWith(GrinderRunner)
class TestRunner {

	public static GTest test
	public static HTTPRequest request
	public static Map<String, String> headers = [:]
	public static Map<String, Object> params = [:]
	public static List<Cookie> cookies = []

	@BeforeProcess
	public static void beforeProcess() {
		HTTPRequestControl.setConnectionTimeout(300000)
		test = new GTest(1, "Test1")
		request = new HTTPRequest()
		grinder.logger.info("before process.")
	}

	@BeforeThread
	public void beforeThread() {
		test.record(this, "test")
		grinder.statistics.delayReports = true
		grinder.logger.info("before thread.")
	}

	@Before
	public void before() {
		request.setHeaders(headers)
		CookieManager.addCookies(cookies)
		grinder.logger.info("before. init headers and cookies")
	}

	@Test
	public void test() {
		HTTPResponse response = request.GET("http://127.0.0.1:8080", params)

		if (response.statusCode == 301 || response.statusCode == 302) {
			grinder.logger.warn("Warning. The response may not be correct. The response code was {}.", response.statusCode)
		} else {
			assertThat(response.statusCode, is(200))
		}
	}
}
아래 request.GET("http://127.0.0.1:8080", params)로 수정한거 이외에는 따로 변경한 부분은 없음
이후 우측 상단에 있는 Validate 버튼 클릭
역시 한 번에 될 리가 없다
바로 에러 발생
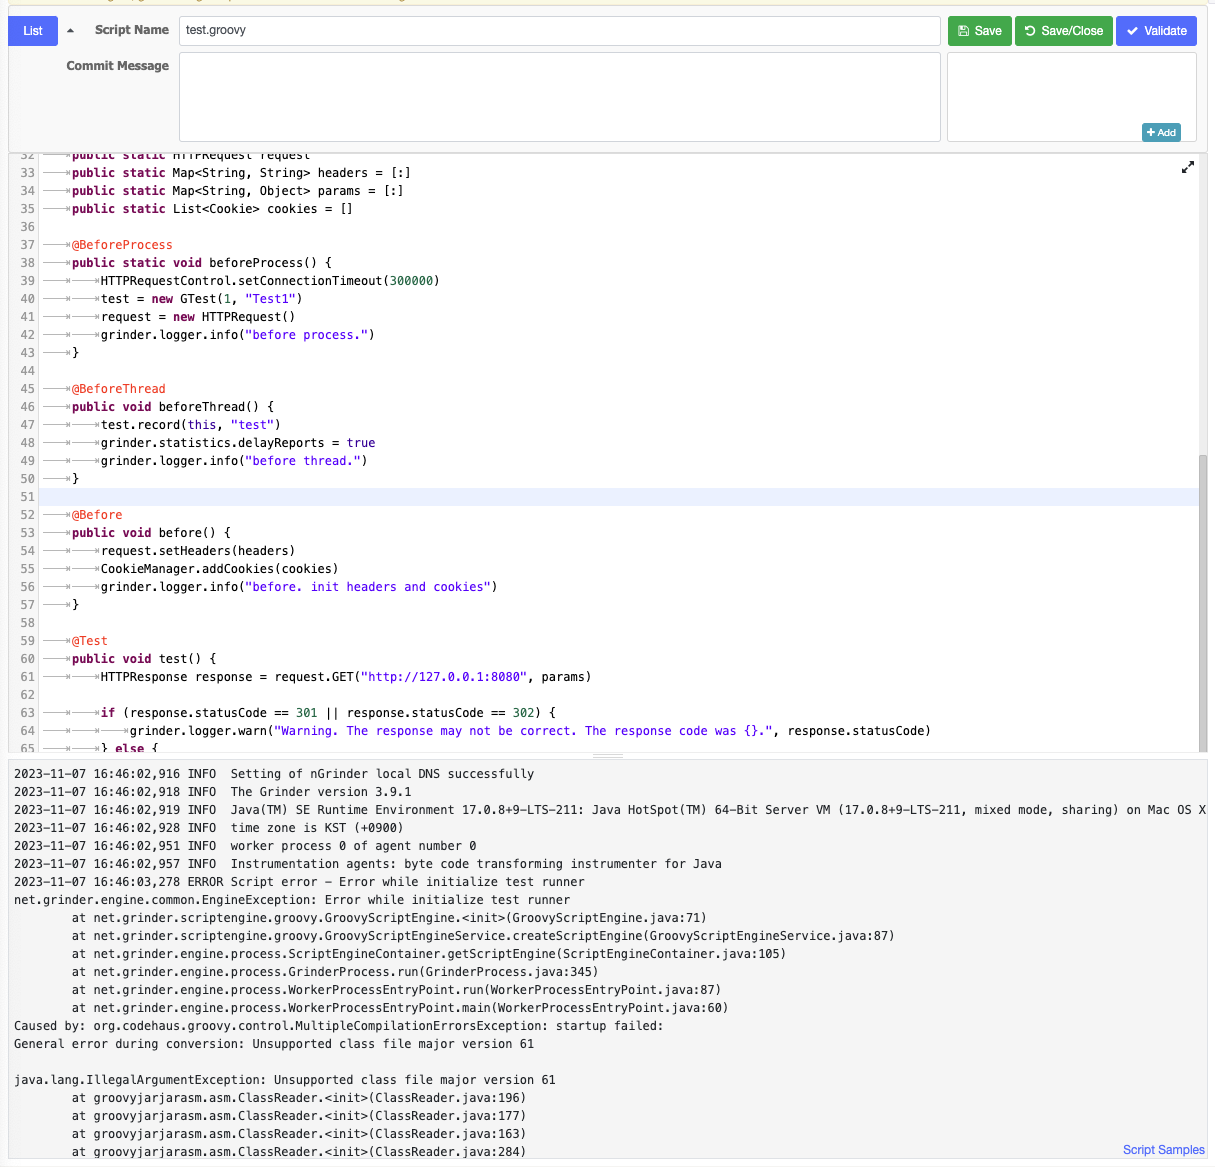
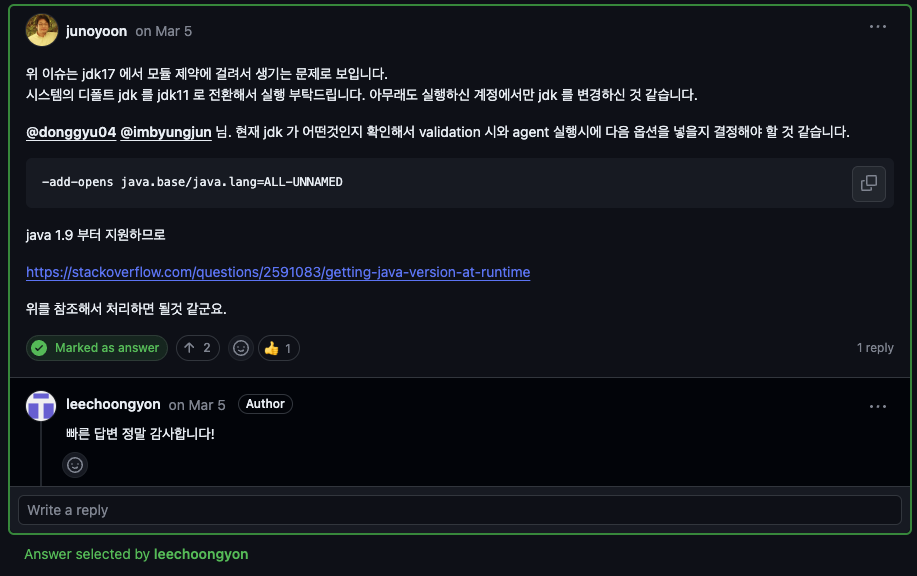
찾아보니 Java 11 버전으로 진행해야 한다고 함
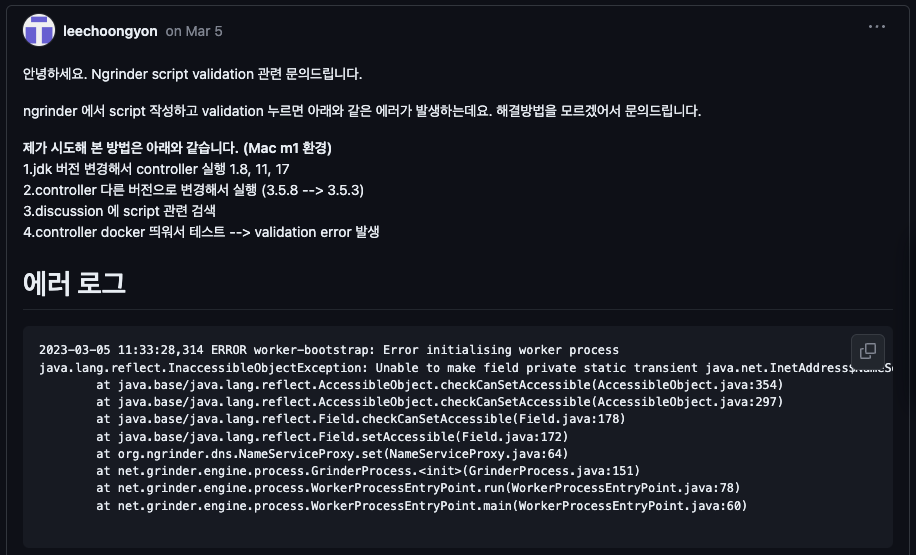
https://github.com/naver/ngrinder/discussions/959
스크립트 validation 관련 문의드립니다. · naver/ngrinder · Discussion #959
안녕하세요. Ngrinder script validation 관련 문의드립니다. ngrinder 에서 script 작성하고 validation 누르면 아래와 같은 에러가 발생하는데요. 해결방법을 모르겠어서 문의드립니다. 제가 시도해 본 방법
github.com
아래 링크에서 Java11 버전 설치
https://www.oracle.com/java/technologies/downloads/#java11-mac
Download the Latest Java LTS Free
Subscribe to Java SE and get the most comprehensive Java support available, with 24/7 global access to the experts.
www.oracle.com
맥북기준 -> 잘 설치되었는지 확인
/usr/libexec/java_home -V
17버전과 11버전 모두 설치된 것 확인
기본 자바 버전을 이전에 17버전으로 설정했었기 때문에 11버전으로 변경하는 작업 진행
(참고: https://8156217.tistory.com/62)
export JAVA_HOME=$(/usr/libexec/java_home -v 11.0.21)
source ~/.bash_profile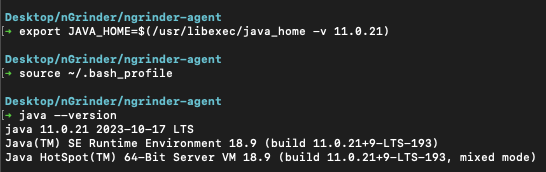
변경 완료
8300 포트로 실행시켰었으므로 8300 포트 PID를 확인해 죽이고 재실행해야 함
lsof -i :8300
kill -9 67627
다시 실행
명령어는 ngrinder-controller-3.5.7.war 파일이 설치된 경로에서 진행
java -jar ngrinder-controller-3.5.7.war --port=8300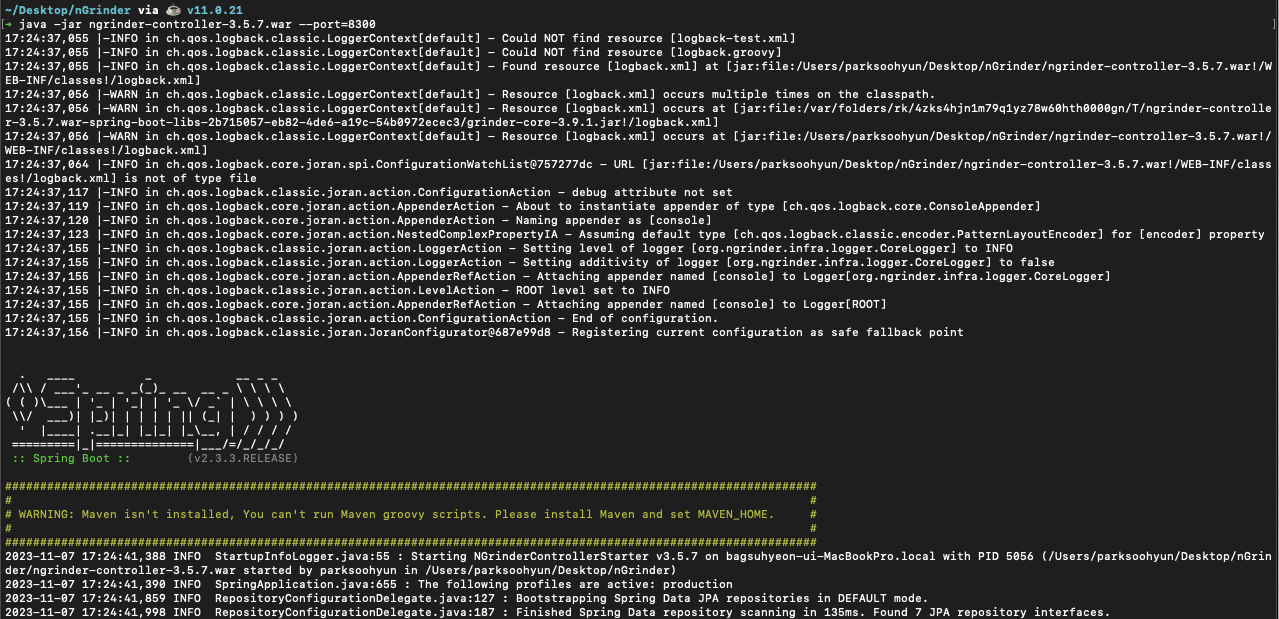
오 다시 실행해서 Validate 버튼을 누르니 잘된다
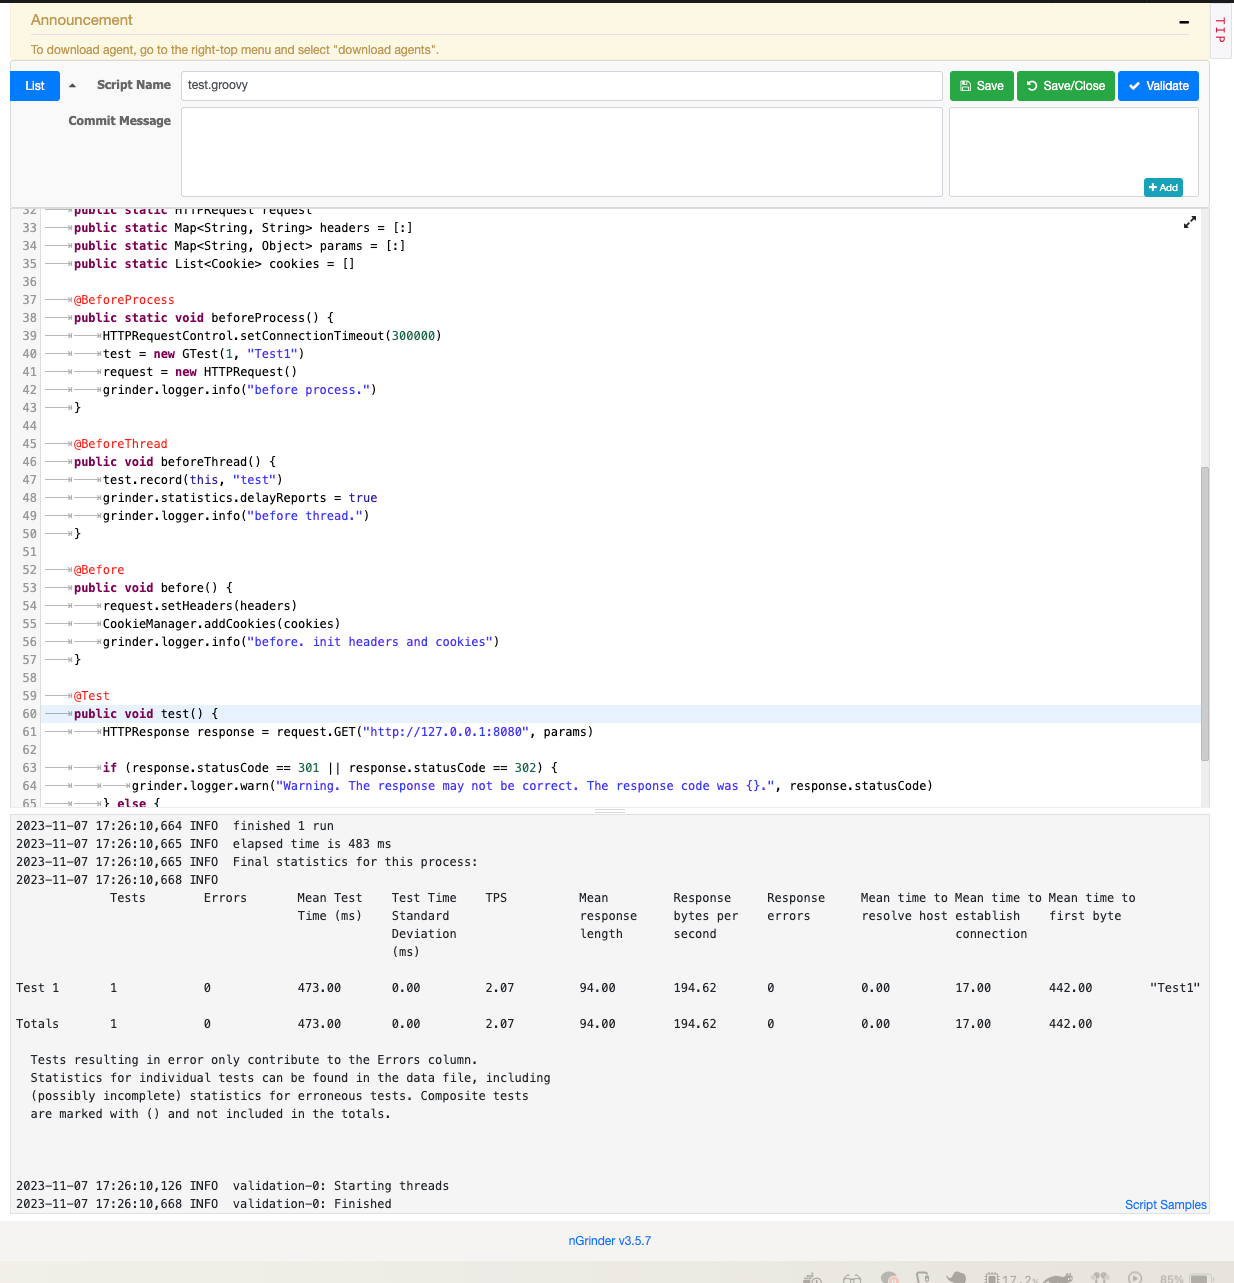
굉장히 신기하군
'STUDY > 개발 고민' 카테고리의 다른 글
| [성능 테스트] nGrinder + Springboot 부하 테스트 - 계획 (0) | 2023.11.08 |
|---|---|
| [성능 테스트] nGrinder + Springboot 부하 테스트 준비 - 성능 테스트 해보기 (2) | 2023.11.07 |
| [성능 테스트] nGrinder + Springboot 부하 테스트 준비 - nGrinder 설치 및 agent 실행 (0) | 2023.10.17 |
| [성능 테스트] 성능테스트를 위한 준비 - MYSQL에 Mockaroo로 더미 데이터 넣기2 (0) | 2023.10.17 |
| [성능 테스트] 성능테스트를 위한 준비 - MYSQL에 프로시저로 더미 데이터 넣기 (1) | 2023.10.17 |


